In this tutorial you’ll learn how to scrape web data, using Postman to access the ScrapeOwl API. You’ll also learn a little bit about Postman, no-code data scraping, automated data scraping, and even creating automated, low-code, multi-step workflows.
Shall we begin?
What is Postman used for?
Postman is an app that makes it easy to create, test, and document Application Programming Interfaces (‘APIs’). However, it can also be used to send and organize API requests without having to build web applications.
Another lesser-known feature of Postman is the ability to construct API requests and then generate the necessary code needed to execute them in a web application. The possibilities are endless.
Who uses Postman?
Postman is mostly used by software developers, but those that aren’t software developers can use it as a no-code or low-code way of interacting with APIs (for example, to initiate an email sequence or populate a Google Sheet). It’s also free for solo use, making it a fun alternative to premium API automation tools such as Zapier and Integromat.
Creating Postman Collections (recommended)
Requests can be organized into Collections, and by creating Collection Variables we can then reuse snippets of data across all of the Collection’s Requests by referencing the Variables (instead of having to remember and retype the information).
In this first step we’ll create a Collection and store our ScrapeOwl API Key and the API Endpoint as Collection Variables.
Start by clicking on the “New” button, and then “Collection.”
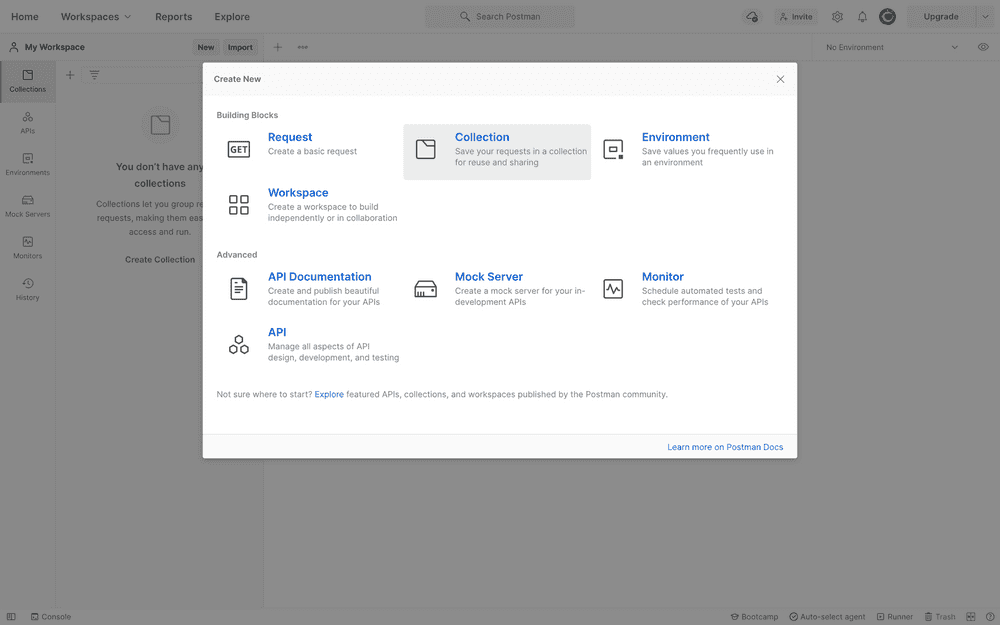
Give the Collection a name (for example, “Daily ScrapeOwl’s”).
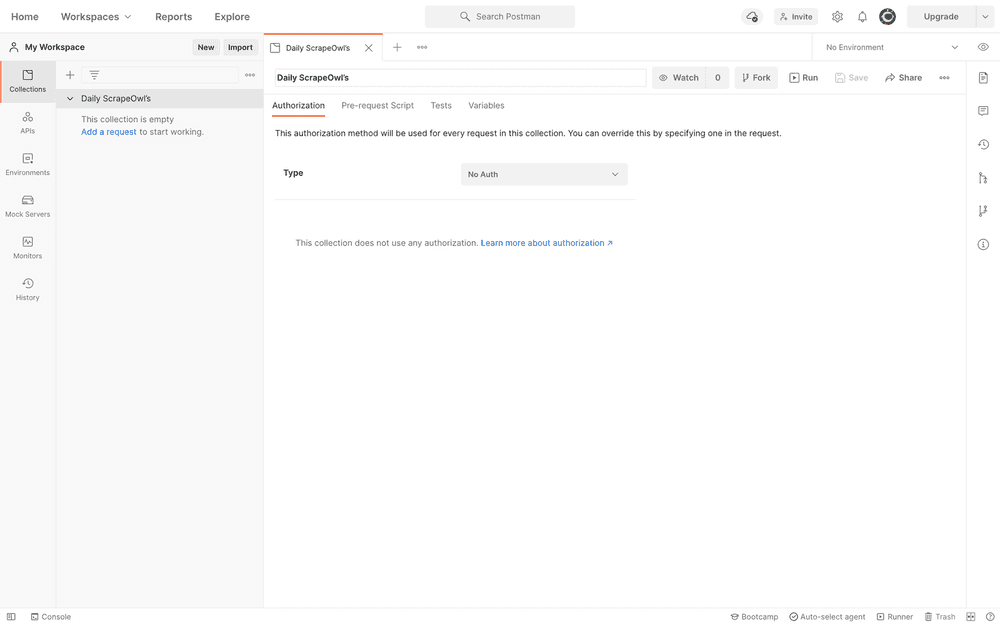
Switch to the “Variables” tab.
Write “api_key” in the “VARIABLE” column.
Paste your ScrapeOwl API Key (which you can find in your ScrapeOwl Dashboard under “API Key”) into the “CURRENT VALUE” column (or the “INITIAL VALUE” column if you’d like to share the Variable with your team).
Set “api_url” to https://api.scrapeowl.com/v1/scrape.
Hit “Save.”
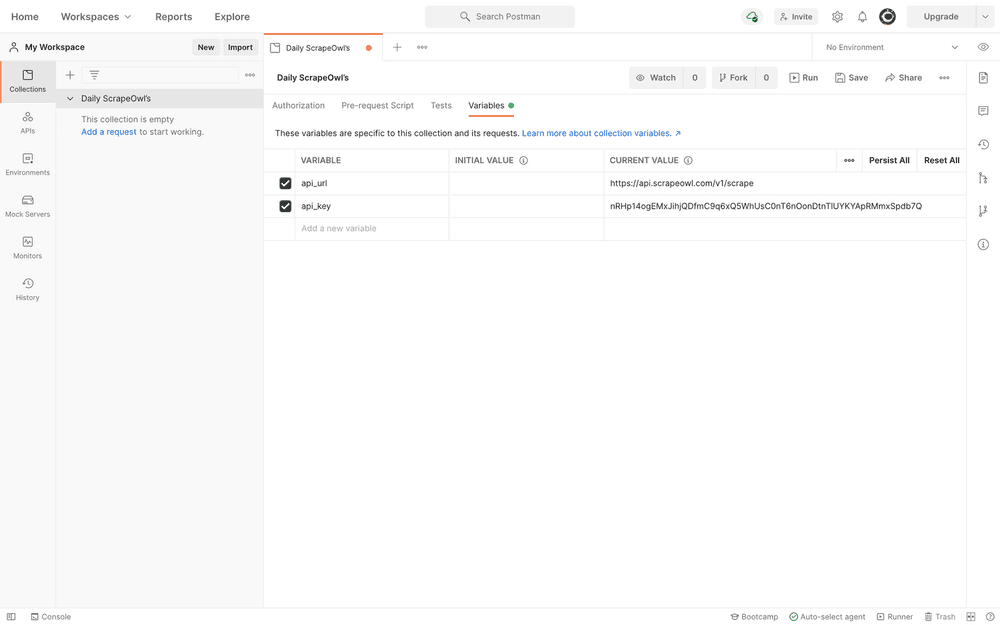
All Requests within the Collection will now inherit these Collection Variables (unless overwritten in the Request), so we’ll never have to remember or retype them again. You’ll see that there are some other tabs — Authorization, Pre-request Script, and Tests — Requests will also inherit these settings, although we won’t need to concern ourselves with that today.
Creating Postman Requests (required)
Next, let’s set up a Request that tells ScrapeOwl to scrape a website. Click the “New” button once more, and then “Request.”
Give the Request a name like “#1 Product on Product Hunt today.”
Save the Request to the “Daily ScrapeOwl’s” Collection.
Click “Save to Daily ScrapeOwl’s.”
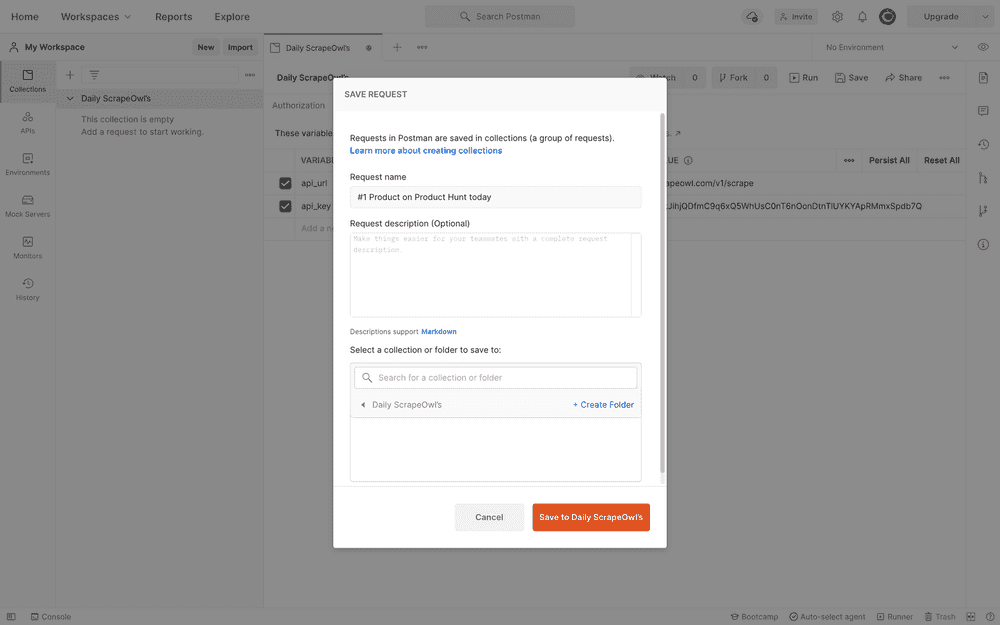
Declaring the HTTP method and Request URL
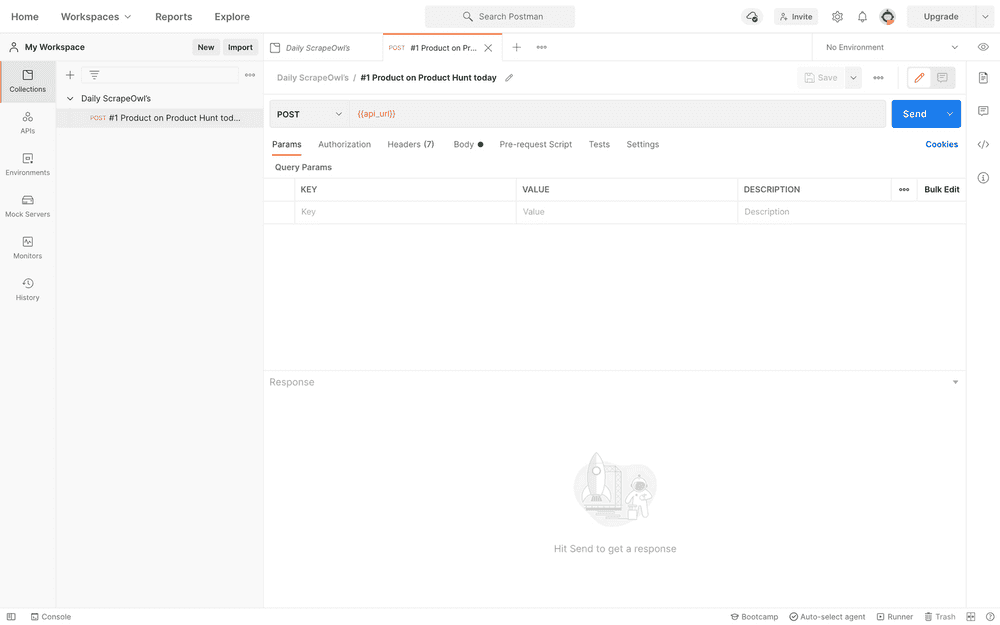
First thing first, ensure that you’re sending the Request via the “POST” HTTP method, and to the correct Request URL (which we earlier declared as “api_url” (write it out as: {{api_url}}).
Generating the Request Body
APIs can be accessed in different ways, hence the various options you should be seeing now (i.e. Params, Authorization, Headers, Body, Pre-request Script, Tests, and then Settings).
ScrapeOwl requires that the API Key (and everything else) be sent within the “Body” as raw (stringified) JSON. We could use the ScrapeOwl documentation to learn how to construct the Request Body; however, we could also take a no-code approach and use the API Request Builder (choosing “JSON” as the output).
Paste the output to “Body” and choose “raw” as the data type.
Replace your API Key with {{api_key}}, making it easier to bulk-update Requests in the future, or overwrite the API Key by switching Environments.
Should you need to beautify the code (i.e. format it), select the “JSON” option from the dropdown and then click “Beautify.”
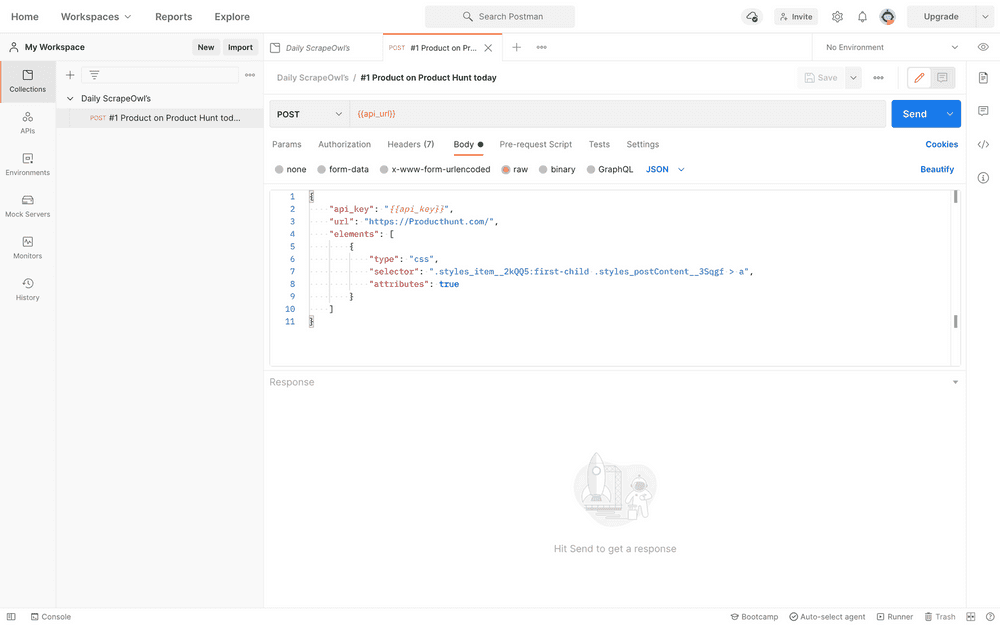
The following code scrapes Product Hunt. It selects the #1 product’s <a> element using CSS selection, and also grabs the attributes — including the href attribute — of the element.
{
  "api_key": "{{api_key}}",
  "url": "https://Producthunt.com/",
  "elements": [
    {
      "type": "css",
      "selector": ".styles_item__2kQQ5:first-child .styles_postContent__3Sqgf > a",
      "attributes": true
    }
  ]
}
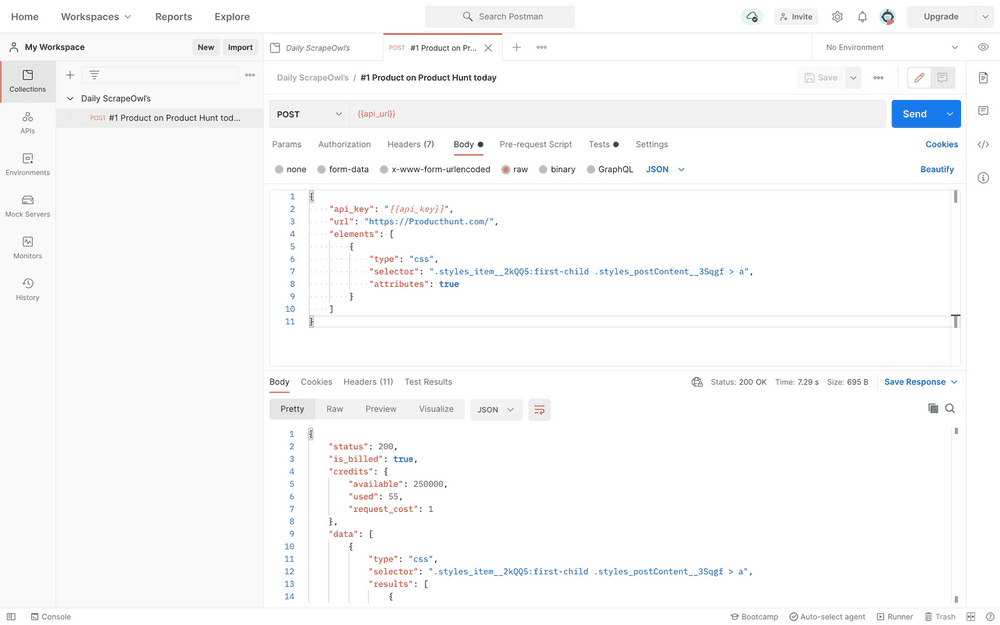
Click “Save” once again, and then “Send” to see the API’s response in the “Response” box. Ensure that you’re using the Postman desktop app to avoid CORS.
Creating Postman Tests (optional)
We may want to decipher the API’s response and then send or store its data somewhere; for example, a Telegram Channel or a Google Sheet. This is where Postman Tests become super useful.
Postman Tests allow us to decipher API responses using JavaScript. During this next step we’ll convert the API’s response into a JSON object, extract the href attribute’s value, and then “POST” it to another API of your choosing.
A little knowledge of JavaScript is assumed, in addition to a couple of Postman-specific things that we’ll cover right now:
pm.responsecontains the responsepm.sendRequestis for sending requests- Echo API is Postman’s dummy API, which we’ll be using for now
With all of this in mind, the following code can be slightly adapted to fulfil any need, but for now, switch to the “Tests” tab and insert the code into the box.
// Get response
let response = pm.response;

// Get body as JSON
let json = response.json();

// data[0] = 1st scrape
// results[0] = 1st element returned
let element = json.data[0].results[0];

// Loop attributes
for (let attribute of element.attributes) {
  // Wait for href attribute
  if (attribute.name == 'href') {
    // Sample POST
    const request = {
      method: 'POST',
      url: 'https://postman-echo.com/post',
      body: { mode: 'raw', raw: attribute.value },
    };

    // Send request
    pm.sendRequest(request, (error, response) => {
      console.log(error ? error : response.json());
    });

    break; // We can break
  }
}
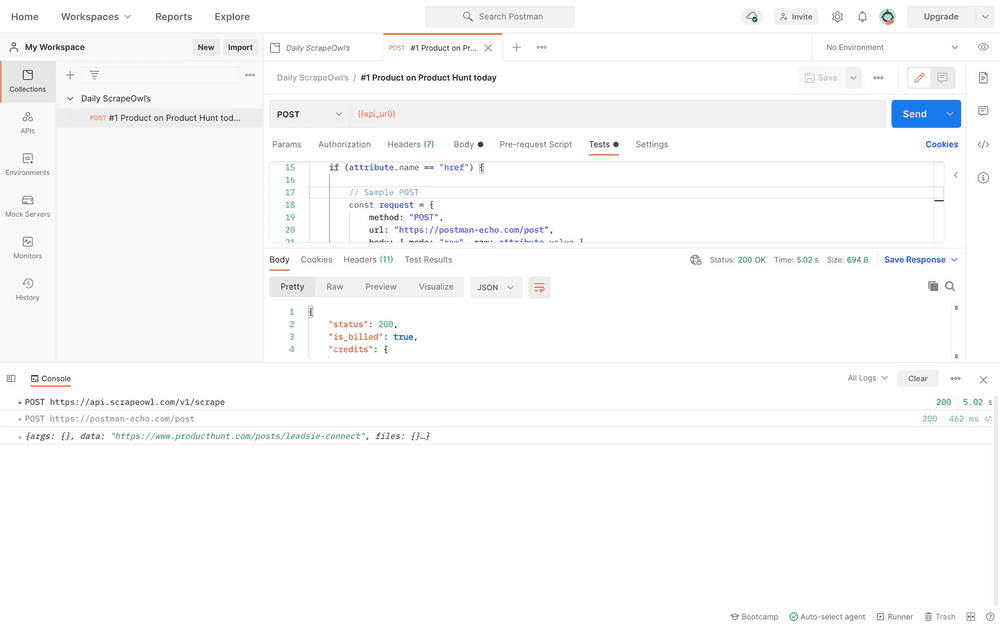
Click “Send”, and then click “Console” in the bottom-left corner, where we should now see the Echo’s request and response.
Creating Postman Monitors (optional)
Now that we’ve scraped the first result on Product Hunt and written some JavaScript code that extracts the href value and POST’s it to an API, moving forward we might want to schedule this Request (or rather, the Collection) to run automatically.
Using Postman Monitors, let’s schedule it to run daily.
Click the “New” button once more, then click “Monitor,” then click “Monitor existing collection,” then select the Collection.
Declare any relevant details, including how often the Collection’s Requests should run, and at which time. Product Hunt refreshes at 12:01am PST every day, so for this tutorial specifically we should set it to a few minutes before that.
Click “Save” and we’re done!
That was fun
In this tutorial we learned how to scrape websites with ScrapeOwl using Postman, a freemium app for interacting with APIs. As an added bonus we also learned how to use Postman Tests to extract data from API responses and send that data to yet another API. Finally, we learned how to automate Requests, saving us time by scheduling them to run at regular intervals.
